I’ve been working on a fun little Unity project that combines the visual effects of a fluid dynamics simulation with an integration to the Twitch API. Sounds like a bit of an odd combination, right? This project has formed part of my ongoing support for @laylacodesit and her Live-Coding Twitch channel,
Unlike the blow-by-blow instructions that you’ll find in my other articles, this “Projects” section is intended to be a tour of some of the projects that I’ve been working on. If you want to replicate these projects, you’ll need to figure out the implementation details yourself, but hopefully, they can be a source of useful hints and inspiration for folks.
The idea is straightforward:
- Viewers of the Twitch channel have the opportunity to participate in a prize-winning competition, by entering the command “!prizedraw” in the chat window.
- Over the course of the broadcast, multiple viewers will add their “entry” into the raffle. This manifests in the form of a tombola ball (only one per viewer)
- Using simulated physics, the barrel rotates, mixing the balls together randomly.
- When the prize-draw is made, barrel rotation is stopped (using a keyboard hotkey) and a “rod” object, projects upwards through the bottom of the barrel and scoops up a single winning ball.
- A collision zone, located near the centre of the barrel, detects the presence of the winning ball and triggers the “you’re a winner” behaviour.
- An animation is used to pan the camera in for dramatic effect and the winning viewer has their name displayed in the scene.
Solution ingredients
The overall solution brings together a number of elements:
- Unity 2019.2.x project
- Using OBS Studio, the Unity application is screen-captured and composited into an OBS scene, before being broadcast to viewers.
- A plain-colour background is set as the Unity background, which is then chromakey cut-out using OBS, just like we do with a person in front of a green-screen (except magenta was used instead of green).
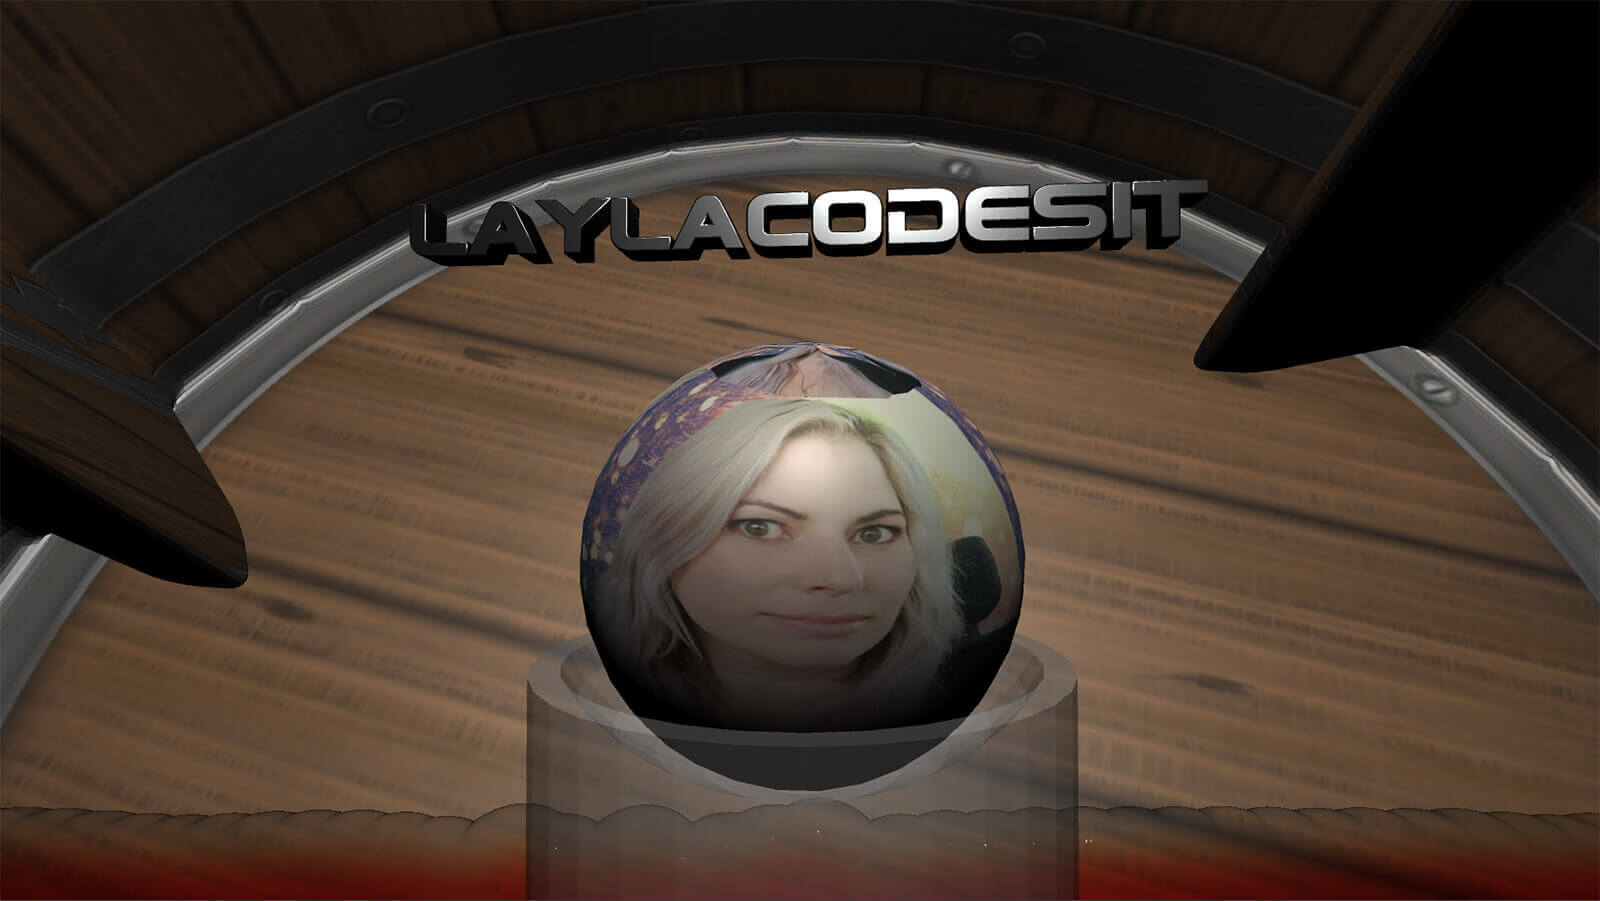
- When viewers submit their entry, thACey get to see a “virtual ball”, that represents their competition-entry, projected into a slowly spinning virtual drum/barrel.
- The ball is wrapped in a texture of the viewers Twitch-Avatar. This helps to personalise their interaction with the competition.
- The texture is obtained on the fly, by downloading the avatar image directly from Twitch, using TwichAPI calls to locate the image link.
- To emulate a lottery tombola, the Unity physics engine is used to simulate the balls bumping and colliding around inside the barrel.
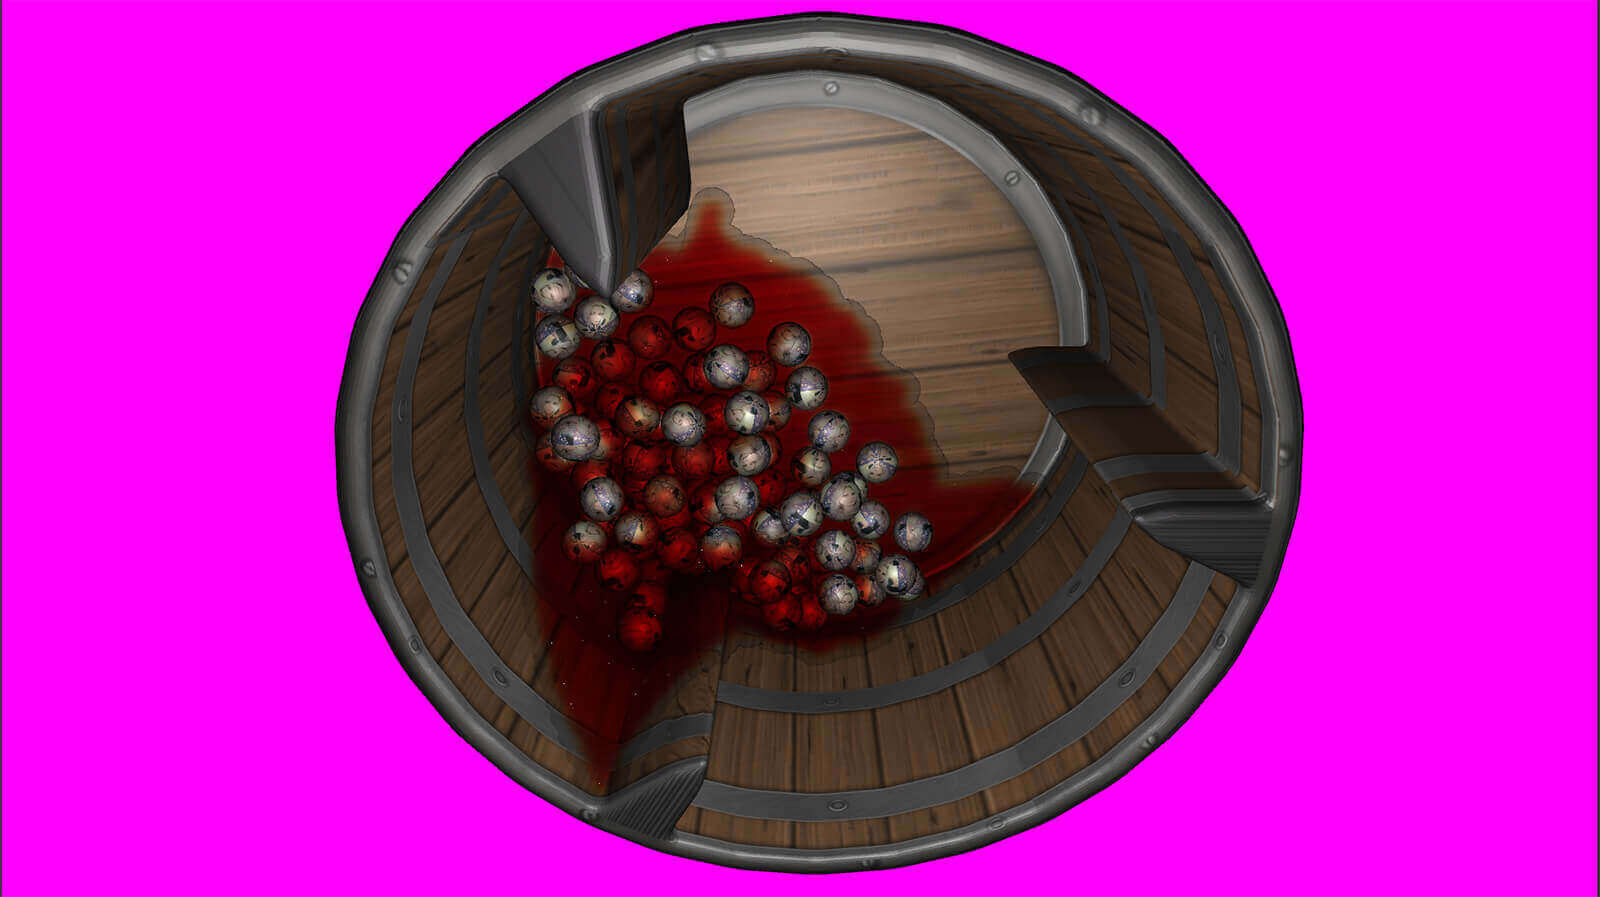
- To add novelty and visual interest for the viewers, the barrel also contains a fluid simulation.
- The fluid is both a visual and physical simulation, meaning that it interacts with both the barrel and any balls that are added by viewers.
- The Unity application runs a client service that hooks-up to the Twitch API and listens for commands.
- This is very similar to how a typical “Twitch bots” works.
- Unity uses C# for scripting, meaning that I could leverage the popular OS library TwitchLib that takes care of the details of integrating with the various Twitch APIs.
- In fact, life gets nicer still, as in 2018 a Unity-specific wrapper for TwitchLib was made available by that OS team.
- This is represented by the single file twitchlib.unity.dll that can just be dropped anywhere into the Unity project asset folder structure.
- In fact, life gets nicer still, as in 2018 a Unity-specific wrapper for TwitchLib was made available by that OS team.
- TextMeshPro is used to display messages onscreen, such as “viewerXYZ has just participated”.
A word of warning for anyone who fancies having a go at making their own version of this project: Running a complex physics/fluid simulation, whilst also using OBS to generate and encode a Livestream, carries a significant computational overhead. You’re going to need a well-specced gaming machine to pull this off.
Below is clip from Twitch showing an early version of the tombola project:
… and this is a revised version, that was themed for international talk like a pirate day!
Obi Fluid
Obi Fluid is a super-cool paid-for asset, created by VirtualMethodStudio and available from the Unity Store. It provides a tonne of functionality used for simulating various fluids using a particle system.
- Get Obi Fluid 4
- Documentation for Obi Fluid can be found at VirtualMethodStudio : Fluid Setup
- A support forum can be found at VirtualMethodStudio : Forum
- VirtualMethodStudio : Demonstration video
- VirtualMethodStudio : Tutorial video
Drawing from the demonstration material and documentation, I found that I was able to produce immediate and impressive-looking results.
However, I subsequently found that getting my fluid to look and behave the way I wanted, took me hours of fiddling - particularly around the “blueprint” for a particular fluid (a definition file containing settings that describe how a fluid behaves).
This is not a fault or criticism of ObiFluid - it’s just a complex piece of software with a great many settings and effect combinations.
- This is a really useful guide to help visualise what the settings mean : ObiFluid guide to blueprint settings
In particular, I found that finding an acceptable setting for particle “resolution” to be a fiddly challenge. There is no correct fits-all solution; an appropriate resolution needs to be matched with the size of your virtual world and the number of particles in the simulation - I still can’t see a better way through this, other than time-consuming trial and error.
The importance of a simplified mesh collider
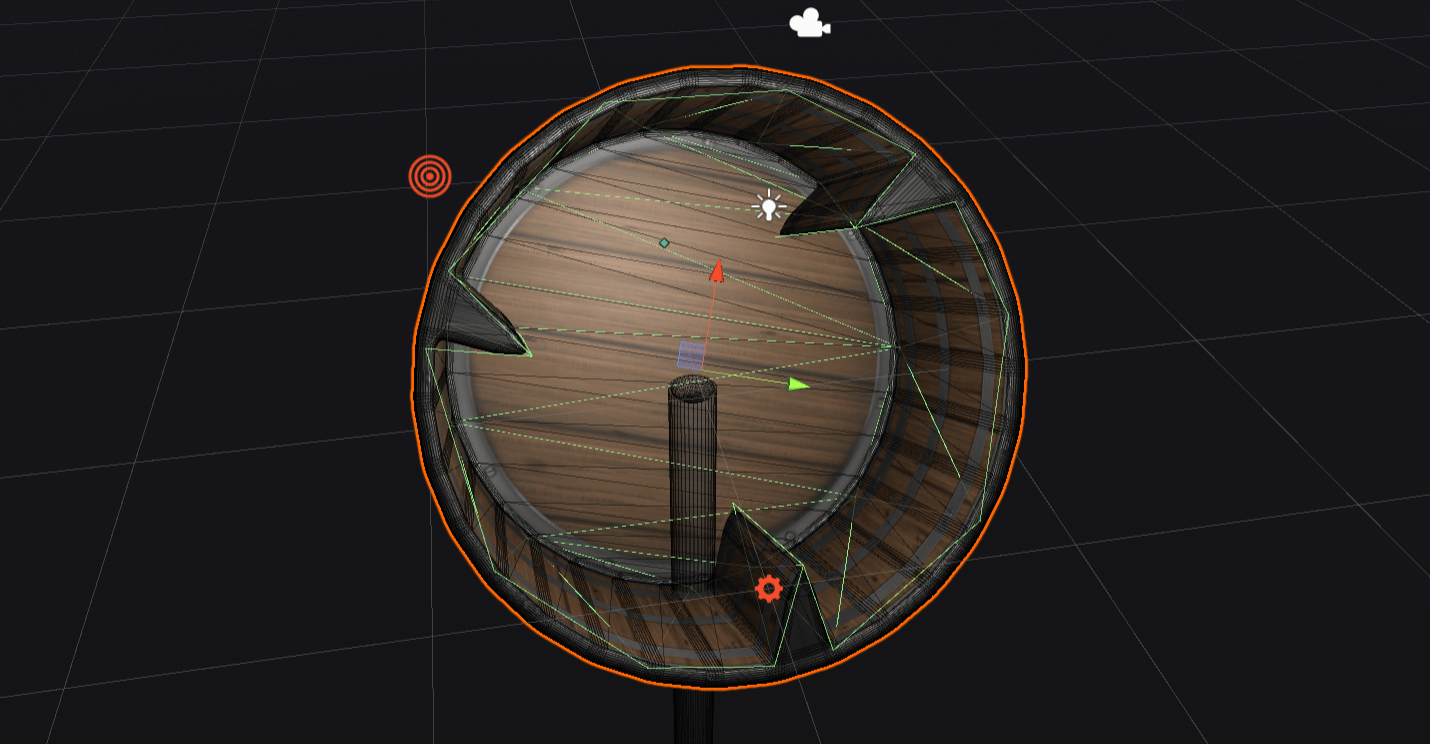
With the addition of an “Obi Collider” component, the particles, that comprise an ObiFluid fluid, interact with a mesh collider just fine. Ultimately this is how we get to see a simulated-fluid contained and sloshing around the inside of a “barrel” model.
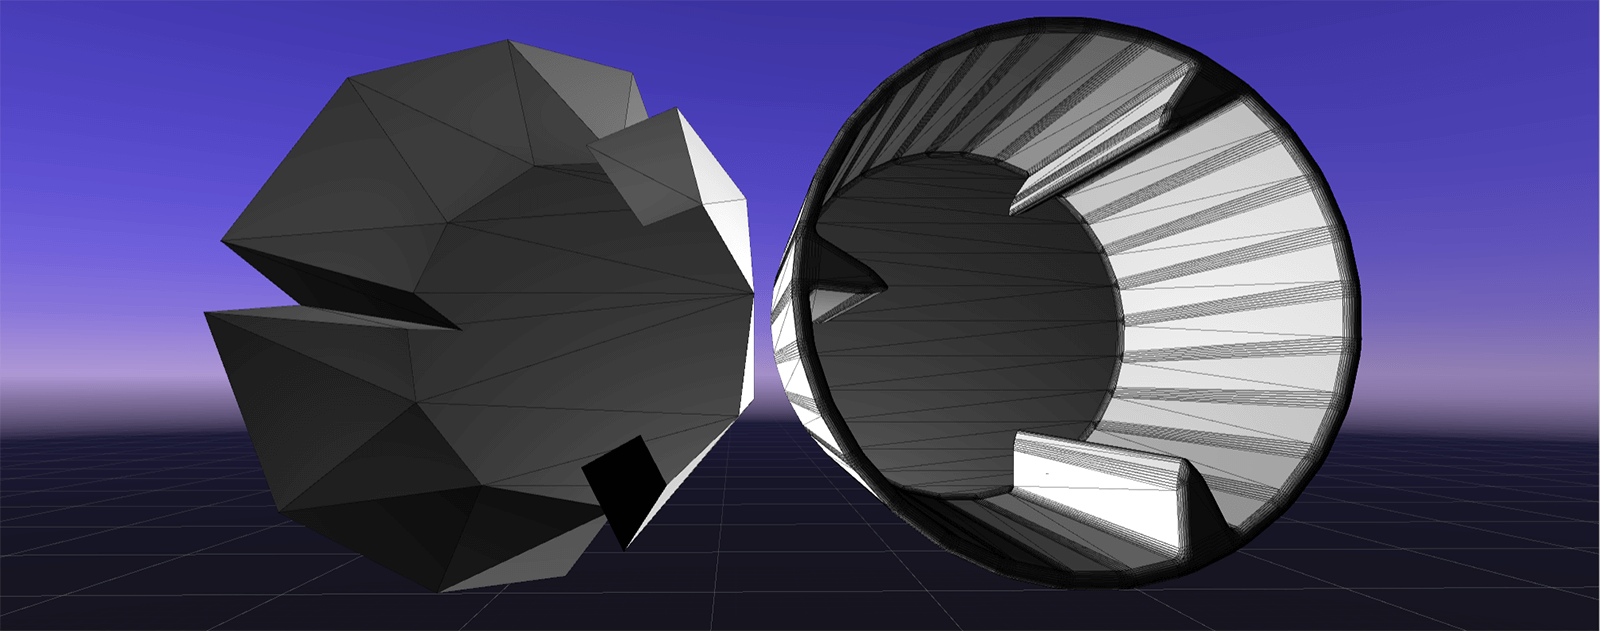
When it comes to Unity, relatively speaking I’m still quite the noob. A lesson that took me a lot of pain and a long time to learn, is that having an overly-complex physics collider mesh absolutely ruined the performance of the simulation and the FPS of the project.
In this project, I initially used a collider-mesh model, with what I assumed was fairly basic geometry, and it still completely trashed performance.
Dropping to the bare minimal mesh, that I now use, meant that I could comfortably go from simulating fluid with about 500 particles, all the way up to about 3000 or even 4000 at a push - whilst running at a solid 60FPS and whilst simultaneously hosting a Livestream and all the other computationally expensive work that goes hand-in-hand with that!
So for the benefit of anyone following in my footsteps - my learning is that the visual mesh and the physics-collider mesh don’t need to be the same.
Use an appropriately detailed mesh for the visual representation of our object, as usual.
Work hard to create a super-simplified second mesh that will be used for the physics collider model.
I created my collider mesh through a combination of a manually-made simple model, combined with several experimental iterations using the Blender Decimate Modifier.
- Here is what the two meshes that I used to create the tombola look like.
- Aside from the vastly simplified geometry, notice also, that I did not include any 3D surfaces that represent the outside to the tombola - we are only interested in modelling collisions inside the barrel, so any other complexity is unused and computationally wasteful.
Physics engine “tunnelling” is a nuisance
During development, I had the problem of a “leaky barrel”.
Even though the barrel model had no gaps in the geometry, the simulated-liquid particles were gradually passing through the collision mesh and falling away into the endless abyss below.
This was a challenge that took me some time to resolve; even getting to a point where I actually understood what was causing the problem, took some time.
This issue boiled down to something that, with the benefit of hindsight, is actually a common issue found in game-engine physics - something referred to as “physics engine tunnelling”.
“Tunneling” can be observed when a second object, that is moving in such a way that it should be expected to collide with the first object - passes straight through the first object.
Typically, this issue manifests when:
- a second object moving with relatively high velocity.
- the physics engine not running at a frequency high enough to provide sufficient positional fidelity.
- an object is positioned by setting its transform manually, rather than through an animation.
What transpires is that the second object effectively “teleports” passed the first object and a collision is not registered by the physics engine.
- This forum thread is a useful reference to further explore
Tunnelling occurs because:
- In a game-engine, 3D objects are not “solid”.
- Objects are made up of infinitely thin flat surfaces and collision detection is based upon those surfaces.
- Similarly, when a 3D model moves through 3D space, it doesn’t actually physically move from one place to another with infinite “presence”, as a real-life object would. Instead, the game engine effectively “teleports” the object from one position to the next.
- The “simulation rate” at which this happens depends on how the physics engine has been configured - but can normally be expected to happen with a much greater frequency than the FPS of the rendered image.
- The physics engine can be instructed to attempt to mitigate the effect (using “continuous collision detection” setting).
- You can read about this here at Unity Docs : Continuous Collision Detection
- Even with these settings active, tunnelling was still a problem in this project. I’m not sure, but I think it was because my various objects had rotational motion and not linear velocities, meaning the engine couldn’t figure out collisions properly.
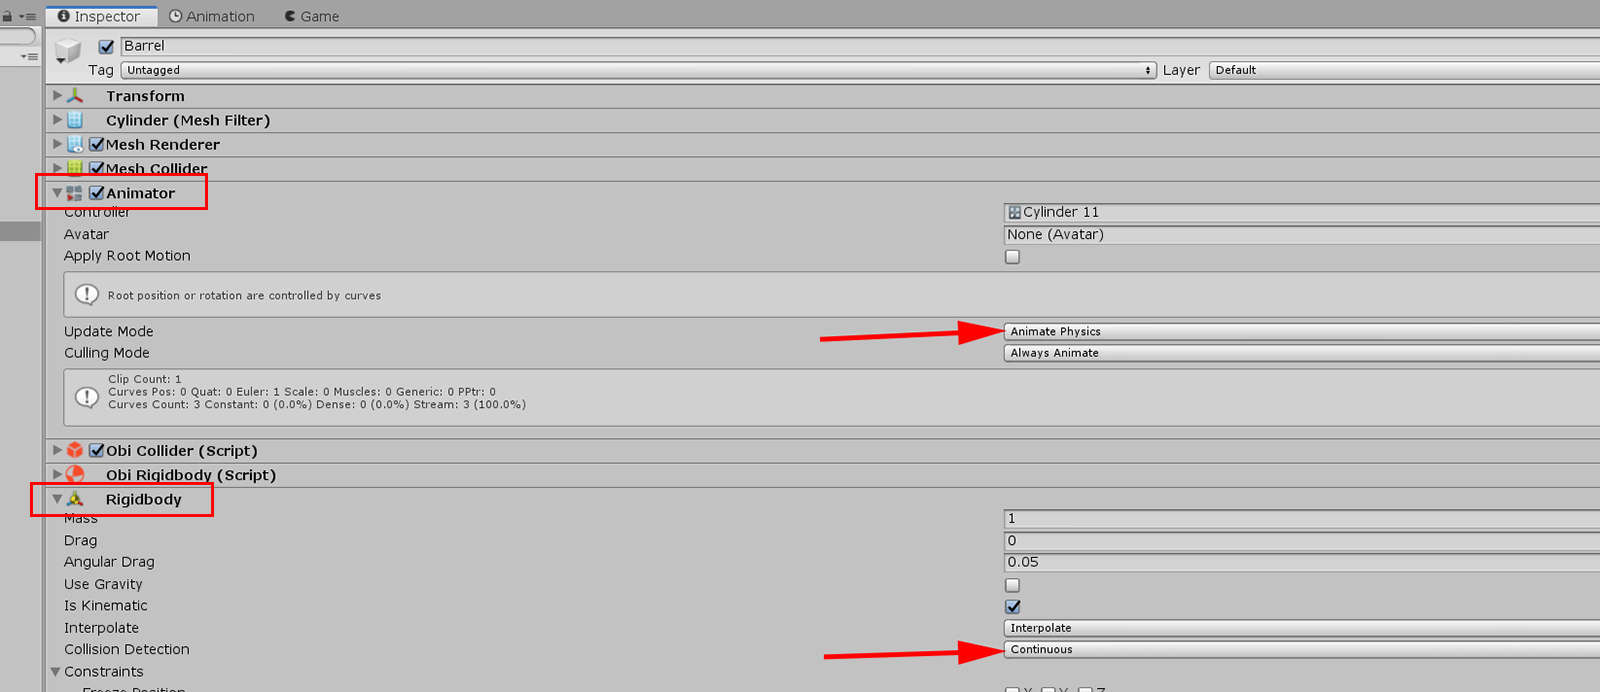
There were two settings that made a night and day difference to the problem of tunnelling (although I never 100% fixed the leaking problem). In the component settings for my rotating “barrel” object:
- In the “animator” component, set “Update mode” to “Animate Physics”.
- In the “rigidbody” component, set “collision detection” to “continuous”.