
This is part seven of a beginner-level series about Unity, aimed at existing .NET business developers, who are interested in dipping a toe into something different.
In Part 1 - Getting started, we explore how a business developer could make a start using Unity, look at the Editor and overview some of the common words that you’ll encounter.
In Part 2 - Scripting, we learn about some coding concepts that are applicable to Unity.
In Part 3 - A prototype mobile app, we work through the steps needed to make a super-simple application and deploy it to a mobile device.
In Part 4 -Logging and debugging with Android , we look at how we can attach the debugger and use logging - basic tools for any developer.
In Part 5 - Unity UI 101 , we take a first look at Unity UI and interact with a basic button control.
In Part 6 - Unity UI Scrolling List - Creating the Scene , we take on a slightly more complex project, by creating a scrolling list of items using Unity UI.
In Part 7 - Unity UI Scrolling List - Adding the Code , we finish the project started in Part 6, by writing a script to call a REST service and populate items in our UI.
Overview
As a business developer, it’s likely that a common aspect of our work will include tasks such as retrieving a list of data from a RESTful API and then displaying this in a UI of some description.
As a reminder, this series is not intended to be an in-depth beginner guide to Unity. Instead, this is meant to be a birds-eye overview, orientated towards existing business developers. You’ll probably be the sort of person who already has a good feel for how software is created, but just wants an overview of the main features and semantics of how a Unity project hangs-together.
- In this particular article, we’re going to continue working on a demo project that we started in the previous article Part 6 - Unity UI Scrolling List - Creating the Scene and we’ll be focusing mainly on creating the script needed to perform a RESTful API call and then populate our UI.
- If you haven’t already been following along with the series, in this case, you absolutely need to follow the previous article otherwise this article will not make sense.
Any code provided in this article is “demoware” in order to retain brevity and focus. We make no effort to address issues of code robustness or error handling etc.
Prerequisites
In this article, we will be creating a project that consumes JSON data from a RESTful web endpoint.
If you are planning on following along, we will need to create a public-facing API that returns a payload that looks like the following. The example has been shortened for brevity, so we should include around ten rows in total:
{"listItems":[
    {"id":"id1","description":"this is the first list item"},
    {"id":"id2","description":"this is the second list item"},
    {"id":"id3","description":"this is the third list item"},
    {"id":"id4","description":"this is the fourth list item"}
]}
Detailing how to create an API is out of the scope of this article. An assumption has been made that, as business developers, we most likely already know how to do this.
The choice of technology used to create the API is not important. For the purpose of this demo, I opted for an Http-Triggered Azure Function for speed of development and zero hosting cost during prototyping.
Create C# DTOs to be used when deserializing JSON
In a moment, we’ll be using the Unity JSON library to deserialize the payload.
A limitation of the Unity JSON parser is that it doesn’t work directly with a top-level collection of results. For example, we cannot parse the following JSON sample:
{[
    {"id":"id1","description":"this is the first list item"},
    {"id":"id2","description":"this is the second list item"}
]}
Instead, collections need to be encapsulated within a parent node, which is why our API service needs to return data exactly like this (with a listItems node):
{"listItems":[
    {"id":"id1","description":"this is the first list item"},
    {"id":"id2","description":"this is the second list item"}
]}
We need C# DTO models that will mirror the JSON structure. Let’s create those two new classes:
- Open up the solution using our code editor.
- As a child of the “Scripts” folder, create a new folder called “Models”.
Create two new empty C# classes (listed below).
- These classes don’t need to inherit from anything else (i.e. they don’t need to be
monobehaviourfor example). - Both classes need to be marked with the
[Serializable]attribute. We can read about this subject here at Microsoft Documentation : Serialization (C#)
- These classes don’t need to inherit from anything else (i.e. they don’t need to be
ListItem.csusing System; namespace Assets.Scripts.Models { [Serializable] public class ListItem { public string id; public string description; } }ListItemCollection.csusing System; namespace Assets.Scripts.Models { [Serializable] public class ListItemCollection { public ListItem[] listItems; } }
Create ListManager script
We need to write some code that is going to serve a number of purposes. The code needs to:
- have a reference to a “ListItem” Prefab
- have a reference to the “LayoutContainer” GameObject
- make a web request to retrieve data from a webservice.
- deserialise JSON data into a DTO
- iterate over the content of the DTO
- Instantiate multiple instances of “ListItem” GameObjects
- Set text of visual elements.
- Attach each new instance of a “ListItem” to the “LayoutContainer” by setting it as a parent.
Let’s go ahead and start creating this script:
- In the Unity Editor, in the Hierarchy View, create a new empty GameObject at the root-level of the scene and name it “ListManager”.
- In the Project View, in the “Scripts” folder, create a new “C# Script” and also name this “ListManager”
- Drag and drop this new script, onto the GameObject we just created.
- Open up the script in our code editor.
- Add the following code into the class
ListManager:
using System;
using System.Collections;

using UnityEngine;
using UnityEngine.Networking;
using UnityEngine.UI;

using Assets.Scripts.Models;

public class ListManager : MonoBehaviour
{
    private string apiEndpointUri = "https://mywebsite.net/api/GetListItems";
    private GameObject layoutContainer;

    [SerializeField]
    private GameObject itemTemplatePrefab;

    void Start()
    {
        layoutContainer = GameObject.Find("/Canvas/ListContainer/Viewport/LayoutContainer");
    }
}
- The
apiEndpointUrivariable needs to be defined to use the appropriate endpoint of your own web service. itemTemplatePrefabis exposed as a property in the Unity UI.
- We should save the script file and swap back to the Unity Editor and go ahead and drag and drop the “ListItem” Prefab into this field.
- When we’re busy writing code, It’s easy to forget to do this plumbing work … so it’s a sensible idea to just do it now!
- If we had prefered, we could have chosen to use the
[SerializeField]attribute to exposelayoutContainerwithin the Unity Editor, in the same way as we have done withitemTemplatePrefab(meaning that we would need to drag-and-drop the reference in the Editor). Instead, to demonstrate that there are different ways to select a GameObject, we’ll use theGameObject.Findapproach, in theStart()method.
Add CoRoutine code to fetch data from the web
If you haven’t already read Part 2 - Scripting] of this series, you may find it useful to refer to that article and specifically the section related to “Coroutines”
Next, we’re going to add a Unity CoRoutine to make a web request.
As a reminder, Coroutines can’t return a value. This can make them somewhat cumbersome to work with, as it encourages developers to put more code into them than is ideal.
Code is almost always better if it can be broken down into smaller methods - ideally, a method should only have a single purpose.
A workaround that CoRoutines do provide, is the option to specify a callback function using Action<T>. We can read about these here at DotNet Perls : Action
The syntax of working with Actions is slightly difficult to follow, so we’ll build up this example in steps:
- Modify
ListManagerwith the following changes:
void Start()
{
    layoutContainer = GameObject.Find("/Canvas/ListContainer/Viewport/LayoutContainer");
    StartCoroutine(GetValueFromApi(SpawnListItems));
}

IEnumerator GetValueFromApi(Action< ListItemCollection> onSuccess)
{
    using (UnityWebRequest unityWebRequest = UnityWebRequest.Get(apiEndpointUri))
    {
        yield return unityWebRequest.SendWebRequest();
        while (!unityWebRequest.isDone)
            yield return null;

        byte[] listItemsResult = unityWebRequest.downloadHandler.data;
        string listItemsJSON = System.Text.Encoding.Default.GetString(listItemsResult);

        ListItemCollection listItemCollection = JsonUtility.FromJson< ListItemCollection>(listItemsJSON);

        onSuccess(listItemCollection);
    }
}

public void SpawnListItems(ListItemCollection listItemCollection)
{
}
Let’s talk about the above code:
- In .NET framework (or .NET Core), we would use:
System.Net.Http.HttpClientas an HTTP client and use it asynchronously using:System.Threading.Tasks.Async, as demonstrated in this example Microsoft Documentation : REST client .
- Unity is different and instead uses
MonoBehaviour.Coroutineas one way to implement asynchronous code. We can read more here at Unity Documentation : Coroutines - Another difference is that Unity uses
UnityEngine.Networking.UnityWebRequestas its own implementation of an HTTP client. We can read more here at Unity Documentation : UnityWebRequest - The
Start()method triggers the UnityStartCoRoutine()method, by passing in both the name of the CoRoutine method itself (GetValueFromApi) and also the name of the callback method - The Coroutine
GetValueFromApiperforms a number of tasks.- It invokes the
Get()method ofUnityWebRequestto GET data from the endpoint that we have provided. - It converts the
byte[]into astringand then parses this into our DTO objectListItemCollectionusing the JSON parserJsonUtility.FromJson. - The populated DTO is passed as a reference to the delegated function
SpawnListItems(). We’ve left this method as an incomplete stub for the moment.
- It invokes the
Add code that iterates results and adds items to the Scene
We are finally in the final straight of this project!
Our code now needs to iterate over the collection of listitems in the DTO and repeatedly instantiate the Prefab of our “listitem” UI object, into our scene.
- Modify
ListManager, completely replacing the methodSpawnListItemswith the following changes:
private void SpawnListItems(ListItemCollection listItemCollection)
{
    if (listItemCollection != null)
    {
        foreach (ListItem item in listItemCollection.listItems)
        {
            GameObject listItem = Instantiate(itemTemplatePrefab) as GameObject;
            listItem.transform.SetParent(layoutContainer.transform, false);

            Transform listItemButtonTextTransform = listItem.transform.Find("ListItemButton/Text");
            Transform listItemTextTransform = listItem.transform.Find("ListItemText");

            GameObject listItemButtonText = listItemButtonTextTransform.gameObject;
            GameObject listItemText = listItemTextTransform.gameObject;

            Text listItemButtonTextComponent = listItemButtonText.GetComponent<Text>();
            Text listItemTextComponent = listItemText.GetComponent<Text>();

            listItemButtonTextComponent.text = item.id;
            listItemTextComponent.text = item.description;
        }
    }
}
How to find GameObjects that are a child of another GameObject
Let’s talk about the previous code snippet, as there are some concepts that need to be clearly understood.
A good place to start is by expressing our intent for this code using words :
“for a given instance of a Prefab object, I want to locate specific child GameObjects using their name as an identifier. For each of those child GameObjects, I then want to search for their “Text” Component and set the value of the “Text” attribute (of that Component) as needed”
Sounds straightforward right? However, we’re now getting into a subject that I personally found to be a bit confusing when I started learning Unity.
Earlier in the code, we saw that we could use
GameObject.Find("xyz")to locate a GameObject within the Scene.When I was learning Unity, I thought it might be reasonable to assume that : if we already have a GameObject at hand, we should easily be able to query that object for any child-GameObjects (in the same way as querying a Scene). I was wanting to write something like the following pseudocode (this code doesn’t work!!!!):
GameObject parentObject = GameObject.Find("myParentObject"); // gets from scene
GameObject childObject = parentObject.Find("myChildObject"); // gets child of parent
GameObject grandChildObject = parentObject.Find("myChildObject/myGrandChildObject"); //gets grandchild of parent
Unity doesn’t work like this.
Instead, we need to search for child objects by using the Transform Component.
If we recall from Part 1 - Getting Started of this series, the Transform Component is unique in Unity, in that every GameObject always has a Transform. This means that in the scripting aspect of the Unity, the Transform type is intrinsically part of a GameObject type and is therefore always available as a property.
This means that when we come to query our GameObject for children, we actually do it via the .transform property.
We also need to understand that the result of this search, will also be of type Transform and not a GameObject.
Returning to the demo code, the above explains why we see these lines:
Transform listItemButtonTextTransform = listItem.transform.Find("ListItemButton/Text");
Transform listItemTextTransform = listItem.transform.Find("ListItemText");
At this point, we now have instances of the Transform type. Our intent is that we now want to access the sibling “Text” Component. To access that, we first need to get a hold of the actual GameObject type. This is what the next two lines of the sample code do:
GameObject listItemButtonText = listItemButtonTextTransform.gameObject;
GameObject listItemText = listItemTextTransform.gameObject;
This finally gets us to the place where we wanted to be originally. With instances of GameObject types to work with, we can now locate Components in a manner that we might expect. The following two lines locate those Components:
Text listItemButtonTextComponent = listItemButtonText.GetComponent<Text>();
Text listItemTextComponent = listItemText.GetComponent<Text>();
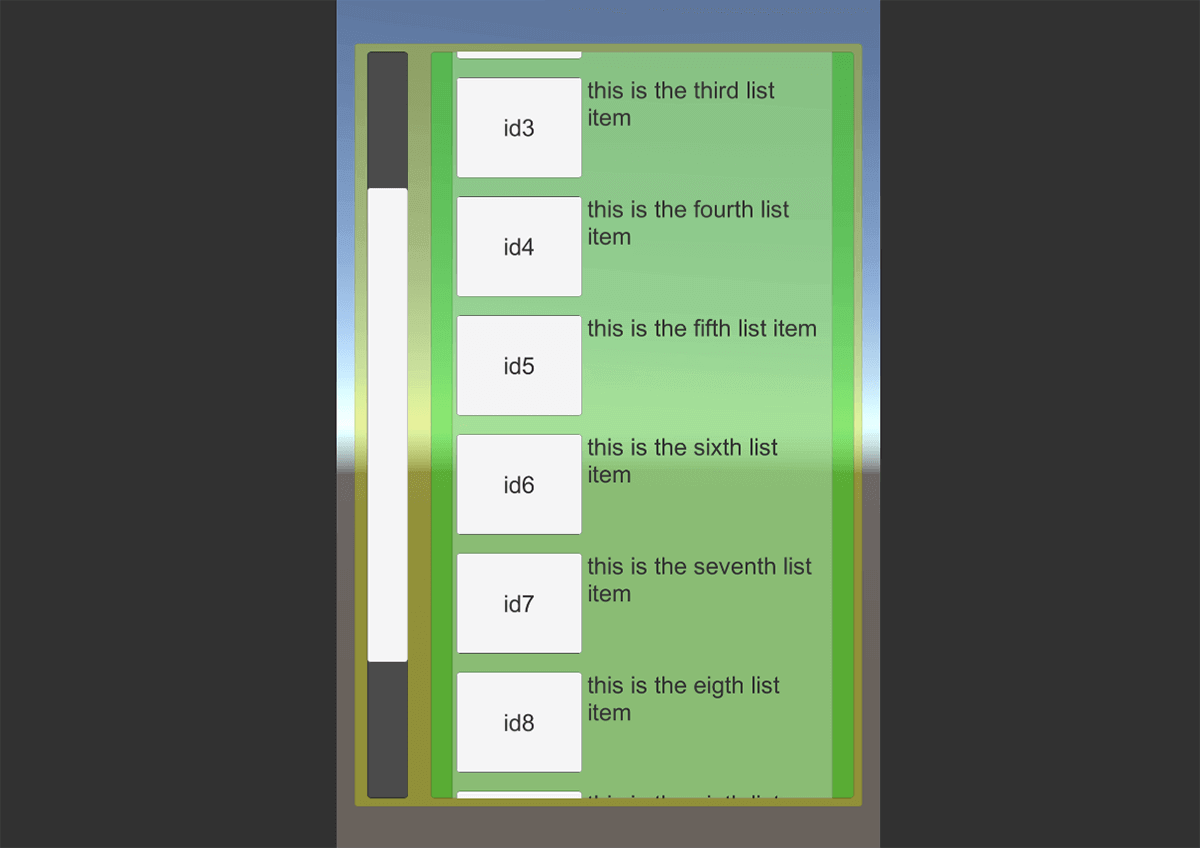
- We can go ahead and test out the project. The finished result should look like this:
So that’s it for this series - if you’ve worked your way from start to finish, I really hope this has been a useful read!
I’ve got a tonne of material that I want to share with you about Augmented Reality in Unity, so be sure to check back in later this year!
Disclosure
I always disclose my position, association or bias at the time of writing; No third party compensate me or otherwise endorse me for my promotion of their services. I have no bias to recommend any of the services mentioned in this article.