Are you new to coding? This series of articles is a beginners’ overview of version-control, Git and GitHub.
In this article we’ll create our first Github repository and save a sample file into GitHub.
In part 1 of this series, we learn that GitHub is an online service for hosting your Git repositories.
In part 2 of this series, we learn some of the key concepts and terminology related to Git.
In part 3 of this series, we learn how to use GitHub to create a new empty repo.
In part 4 of this series, we install Git on our local machine and clone our new GitHub repo.
In part 5 of this series, we learn how to begin working with Git - how to commit files, how to push them to GitHub and more.
In part 6 of this series, we learn how to work with Git branches - how to create them, move between them and merge changes.
Sign up for your GitHub account
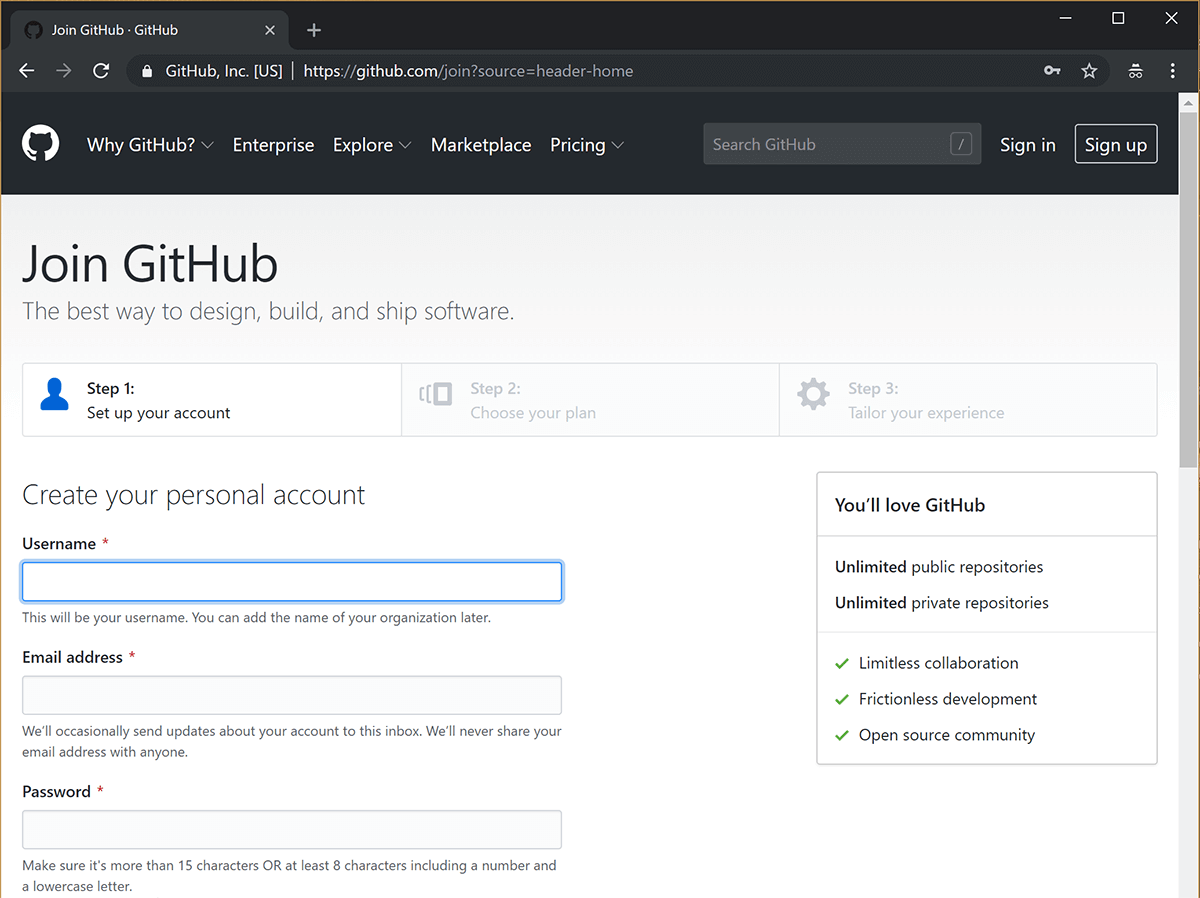
Before we get stuck into learning how to use Git itself, let’s register an account with GitHub then we’ll wire everything together in a step-by-step process.
- Let’s start by heading over to GitHub and registering for a new account : https://github.com. We don’t need any premium features, the free version of GitHub has everything we need.
When signing up for any online service, I strongly recommend creating a unique password and then making a record of it using a keychain service such as LastPass or 1Password.
Hello World - Your first GitHub repository
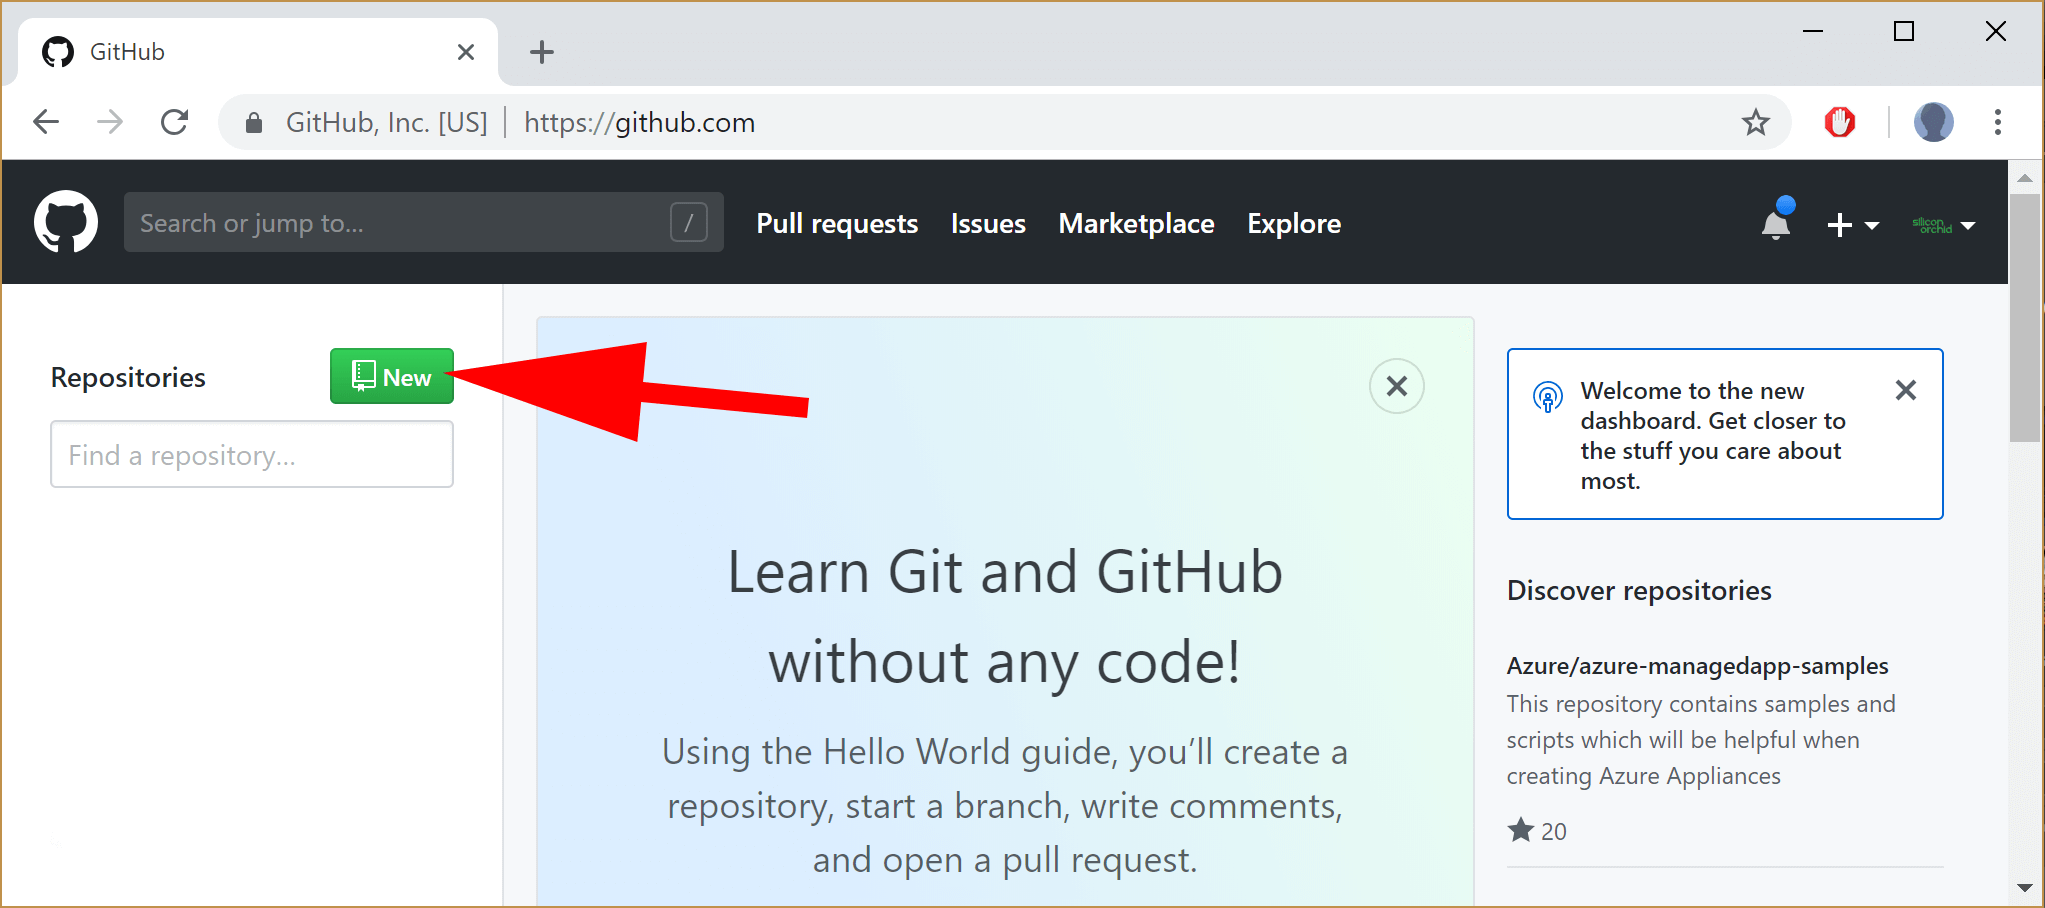
In time-honoured fashion, our first version-control project will be a “Hello World” sample.
- From the GitHub web portal, click the “New Repository” button.
From the GitHub “New Repository Page”, fill in the following details:
Give the repo a name like “HelloWorld”
The option for
PublicorPrivateis up to preference - If you want anybody to be able to see your project, leave it set to ‘Public’.
> Note that although Public means that anyone can see your code, this doesn’t mean that anybody can actually edit or change your project. This is possible, but you need to give other people permission.Check the option for
Initialize this repository with a README. We’ll talk about what this is in a moment.For this exercise, just ignore the option for
Licence. If you want to learn more about this, visit this page on licencing.
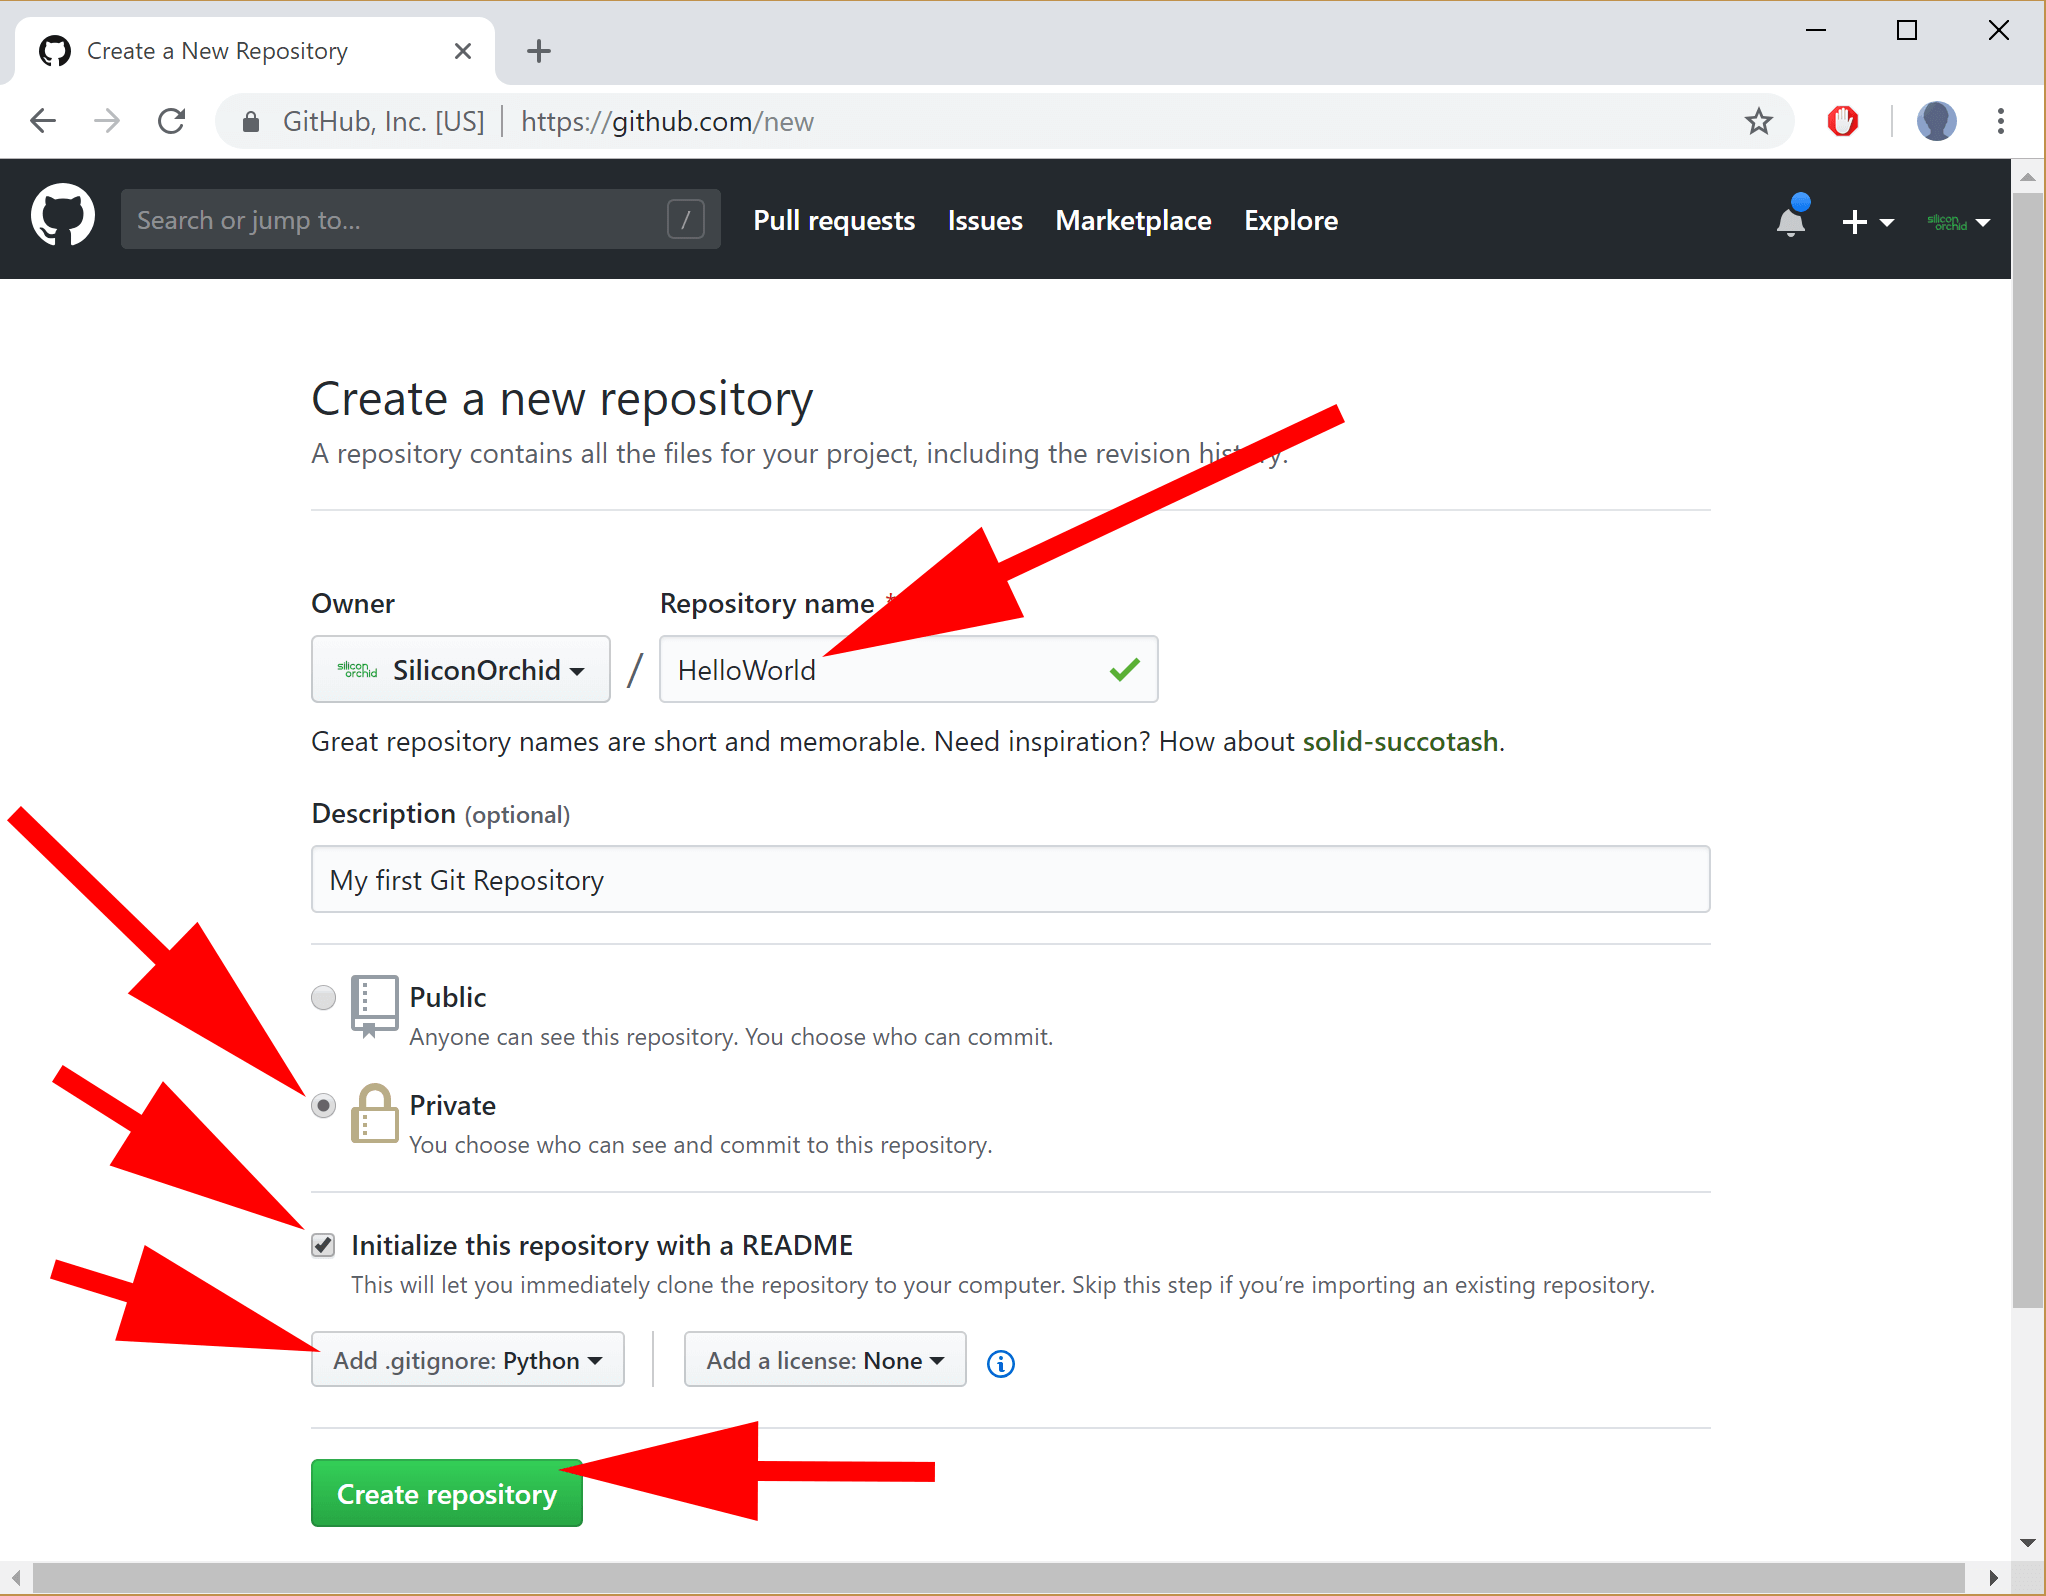
That’s all there is to creating a new repo! It should look something like the following screenshot:-
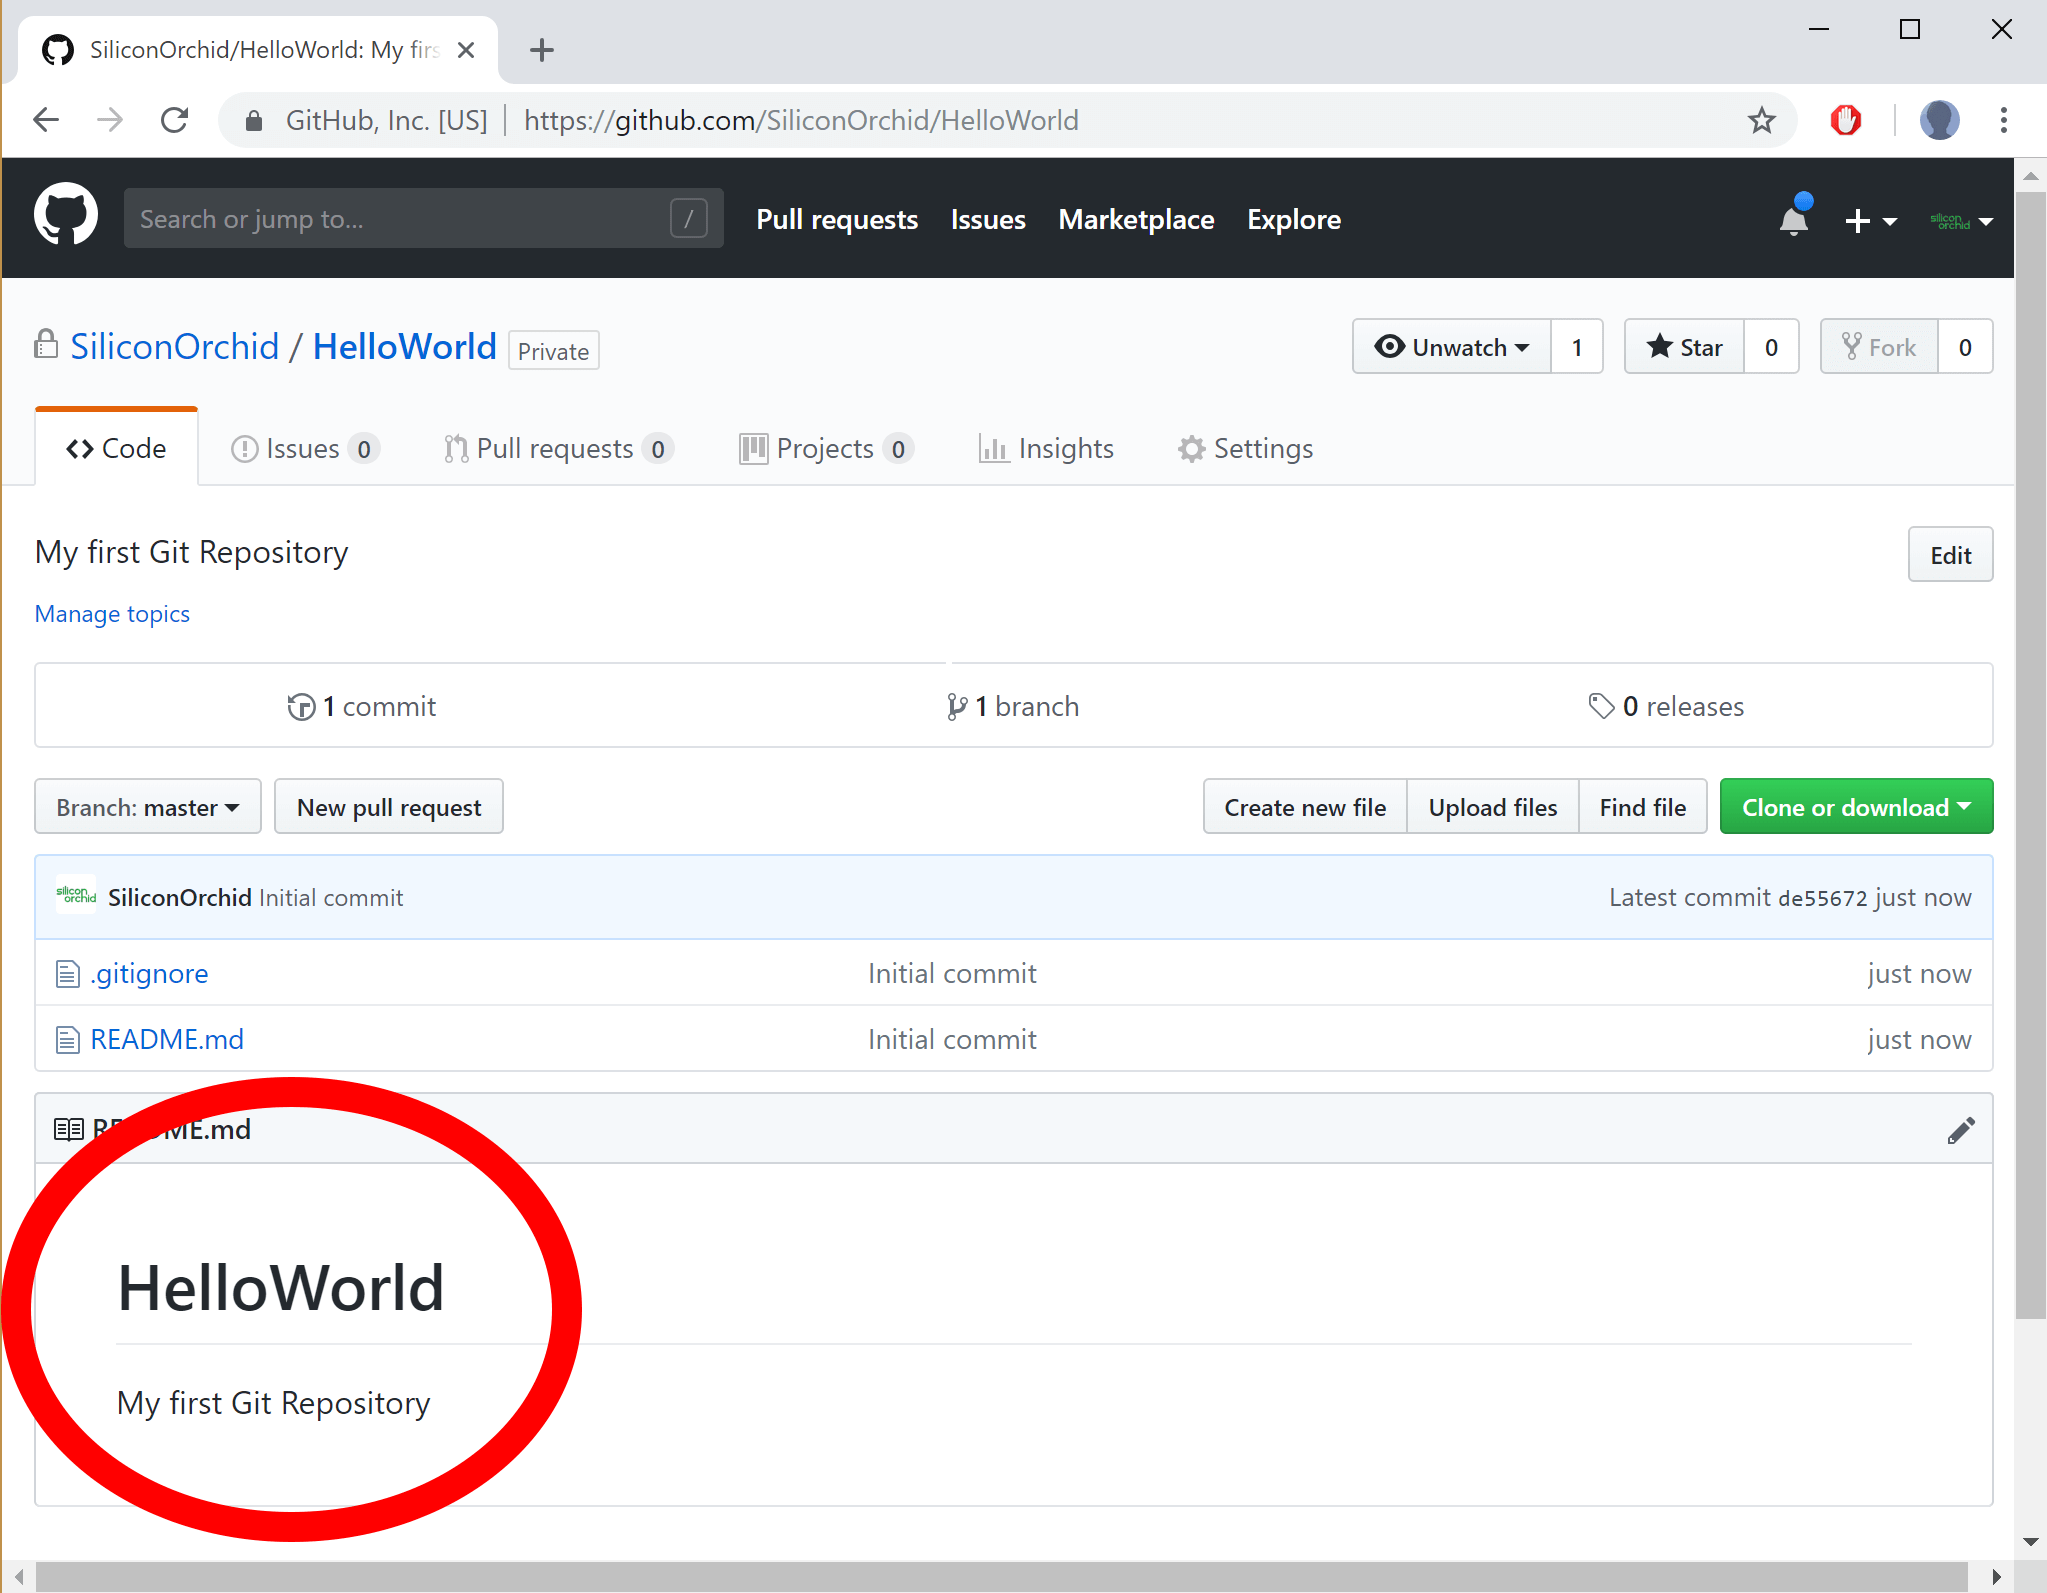
The Repository’s README file
In the above screenshot, the part of the page relating to the README file is circled. When we selected this option a moment ago, it automatically created a readme.md file.
The readme.md file itself appears in the repo, alongside every other file. However, GitHub extracts the contents of this file and displays it on the summary page. This means that we can edit the readme.md file later and any changes you commit will be shown here.
The Readme file is used to display information about the project. Typically, it includes a brief summary of what the project is, how to use or install it - and perhaps a list of any prerequisites that will be needed. Have a look at other repositories on GitHub to get an idea of what could be helpful to include.
The readme file is written using a type of markup language called “MarkDown” - here is a link to a cheatsheet to using markdown here.
Next, in part 4 of this series, we’ll install Git and clone a repo.
PREVIOUS : Read part 2 : Basic Git concepts
NEXT : Read part 4 : Install Git and Clone a GitHub repository