
This is part four of a nine-part series that explores how to create a Unity application for a mobile device, using Augmented Reality and Azure Spatial Anchors
- In Part 1 we introduce the project, requirements, technologies and various AR concepts.
- In Part 2 we follow the steps in the project QuickStart guide.
- In Part 3 we create a basic Unity ARFoundation application.
- In Part 4 we look at one of the building blocks of AR - the “Placement Cursor”.
- In Part 5 we explore how the UI for the project works.
- In Part 6 we learn how Azure Spatial Anchors can be used in our project.
- In Part 7 we step up our game by looking at how we can add and move virtual scenery.
- In Part 8 we develop functionality that saves and restores virtual scenery to the cloud.
- In Part 9 we learn about the Azure Functions backend for the solution.
The entire project source code that accompanies this series can be found at:
Note: In this article, we’re going to build upon the project that we started in the previous article.
An issue that we face when developing an AR application is “how can we interact with the real-world - how do we correlate the real world with our virtual twin?”
The Plane tracking feature that we added to our demo project in the previous article, plays a significant part in the overall solution. With this component, we’ve already seen how we can now identify things like floors, walls, worktops, etc.
To interact with an AR virtual world, we need to be able to position virtual objects.
This introduces the complication of finding a way to use the inherently 2D screen of a mobile device, as a tool to interact with a 3D world.
We can achieve this by using a combination of the detected planes and a virtual “pointer”.
In this project, we’ll be referring to this pointer as a “Placement Cursor”.
We can think of this Placement Cursor as working a bit like a laser-pointer:
- A RayCast (part of the Unity physics engine) is “projected out of the back of our mobile device” and into the scene that we view through the camera.
- Where the ray strikes a Plane - a detected real-world surface - this intersection becomes a point in 3D space that we can then do something with.
- In addition to receiving 3D coordinates of the intersection, we also receive the rotation/orientation of the plane.
- In Unity the combination of location and orientation is called the Pose
- With this information, we can apply the same Pose to virtual 3D objects, creating the illusion of “placing” them onto real-world surfaces.
As a reminder from the first article in the series, the coordinate system in an AR session is relative to the position of the mobile device at the beginning of the session … “up” isn’t necessarily the “y” coordinate!
Create a Prefab to be used as the placement cursor
We should use an appropriate .PNG image to represent our cursor.
Tip: A .PNG is used over formats such as .JPG, because it is 24bit and supports an alpha channel … i.e. parts of the image can be partially or fully transparent.
We can create and use our own image if we prefer, but for this tutorial, it would be easiest to just grab a copy of the one that is supplied with the main demo project:
- download
AR Placement Cursor.pngfrom SiliconOrchid/Unity-AR-AzureSpatialAnchor-DemoPrivate and place it in theassets/imagesfolder. In this demo, we’ll call itAR Placement Cursor.
Next, we want to present the texture that we just download as a Unity Material:
- In the Project view, in the
assets/materialsfolder, right-click and create a new “Material”.- Name the new Material “PlacementCursorMaterial”
- With the new Material selected, in the Inspector view, locate the Shader property (top right corner). Change it from its default value of “Standard” and change it to “Unlit -> Transparent”
- Drag+Drop the new texture “Assets/Images/AR Placement Cursor” onto the texture property of the Material

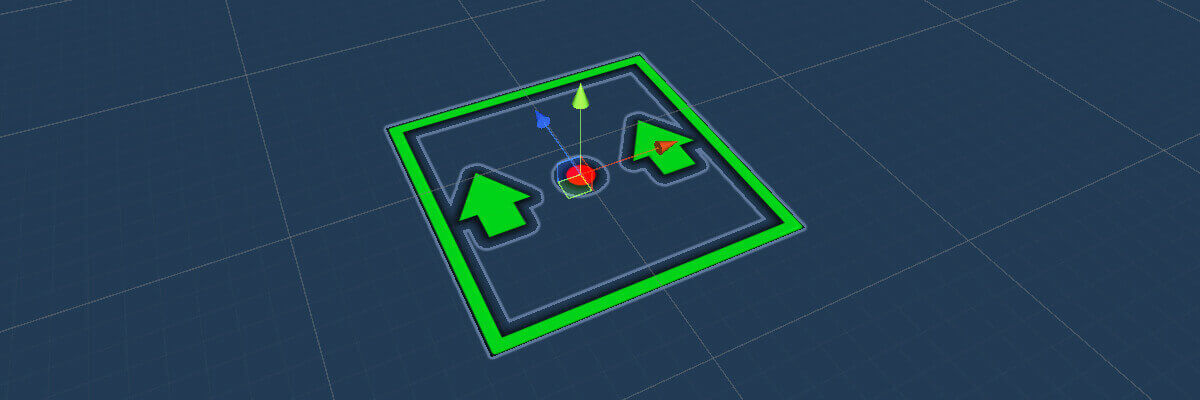
Next, we want to create a very basic 3D primitive that will be used to display the new material:
- In the Hierarchy view, create a new empty GameObject and call it “PlacementCursor”
- As a child of the new empty “PlacementCursor”, right-click and create another GameObject by selecting “3D Object -> Quad”.
Note: In Unity, the scale of “1” unit corresponds to approximately 1-metre. In the context of rooms and furniture, that’s probably going to be too big, so we need to rescale our cursor to a more appropriate smaller size.
Go ahead and make the following edits to the “PlacementCursor/Quad” GameObject:
- Edit the “Transform - > Position” attributes like this:
X: 0,Y: 0.05,Z:0.
- There is just a tiny offset in the Y-axis so that the object “hovers” fractionally above the Plane on which it is placed. This prevents distracting graphical glitches when the two objects are in the same location.
- There is just a tiny offset in the Y-axis so that the object “hovers” fractionally above the Plane on which it is placed. This prevents distracting graphical glitches when the two objects are in the same location.
- Edit the “Transform - > Rotation” attributes like this:
X: 90,Y: 0,Z:0.
- This is so that the image “lies flat against the surface”.
- Edit the “Transform - > Scale” attributes like this:
X: 0.1,Y: 0.1,Z:0.1.
- This is so that the placement cursor appears to be roughly 10-centimetres in size.
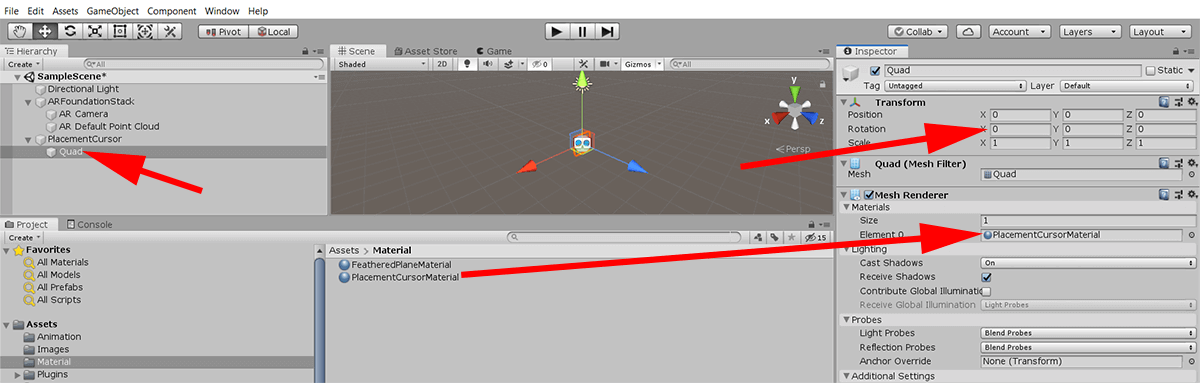
Finally, we need to add the Material to the 3D Quad:
- With the “PlacementCursor/Quad” GameObject still selected:
- drag+drop the “Assets/Materials/PlacementCursorMaterial” across from the Project View…
- … and onto the property of “Mesh Renderer -> Element 0” in the Inspector View
To finish this section of work, we want to turn the GameObject instance into a Prefab:
- Drag+Drop the “PlacementCursor” GameObject from the Hierarchy and into the “Assets/Prefab” folder.
- Delete the original “PlacementCursor” (which should have now turned blue) from the Hierarchy.
We’ll put our newly created Prefab to use a bit later in the article.

Add code for the placement cursor
Let’s turn our attention to the script that will make the placement cursor work. In the Unity Editor, create the following new C# Scripts:
- in the folder “Assets/Script/Managers” create the script:
- “PlacementCursorManager” - this component will contain the code that drives the placement cursor.
- “AppStateManager” - this will be used as a centralised component for project-wide state management.
- in the folder “Assets/Script/Components” create the script:
- “GeneralConfiguration” - this will be used as a centralised component for project-wide configuration settings.
- In the script file `assets/script/components/GeneralConfiguration.cs”, add the following code:
using UnityEngine;

public class GeneralConfiguration : MonoBehaviour
{
    [Header("Visual Items")]

    [SerializeField]
    [Tooltip("Prefab : Used to visualise where an object will be placed on planes - instanced by 'PlacementCursorManager'")]
    public GameObject placementCursorPrefab;
}
- In the script file
assets/script/managers/AppStateManager.cs, add the following code:
using UnityEngine;


public class AppStateManager : MonoBehaviour
{
    [System.NonSerialized]
    public Pose placementCursorPose; // used as a way to expose the placement and position of the spot where they raycast touches a surface

    [System.NonSerialized]
    public bool placementCursorIsSurface = false; // used to flag whether the raycast is hitting at least one surface
}
Note: The property fields of this class are
public. We use the attribute[System.NonSerialized]to prevent the Unity Editor displaying these public fields in the Inspector. This is intended to avoid any confusion, in case it appears that we are being expected to drag+drop items for configuration purposes, in the Editor.
- In the script file
assets/script/managers/PlacementCursorManager.cs, add the following code:
using System.Collections.Generic;

using UnityEngine;
using UnityEngine.XR.ARFoundation;
using UnityEngine.XR.ARSubsystems;

public class PlacementCursorManager : MonoBehaviour
{
    private AppStateManager appStateManager;
    private GeneralConfiguration generalConfiguration;
    private ARRaycastManager arRaycastManager;

    private GameObject placementCursor;


    void Awake()
    {
        appStateManager = FindObjectOfType<AppStateManager>();
        generalConfiguration = FindObjectOfType<GeneralConfiguration>();
        arRaycastManager = FindObjectOfType<ARRaycastManager>();
        placementCursor = Instantiate(generalConfiguration.placementCursorPrefab) as GameObject;
    }

    void Update()
    {
        UpdateCursorPose();
        UpdateCursorIndicator();
    }

    private void UpdateCursorPose()
    {
        var screenCenter = Camera.current.ViewportToScreenPoint(new Vector3(0.5f, 0.5f));
        var arRaycastHits = new List<ARRaycastHit>();
        arRaycastManager.Raycast(screenCenter, arRaycastHits, TrackableType.Planes);
        appStateManager.placementCursorIsSurface = arRaycastHits.Count > 0;
        if (appStateManager.placementCursorIsSurface)
        {
            appStateManager.placementCursorPose = arRaycastHits[0].pose;
        }
    }

    private void UpdateCursorIndicator()
    {
        if (appStateManager.placementCursorIsSurface)
        {
            placementCursor.SetActive(true);
            placementCursor.transform.SetPositionAndRotation(appStateManager.placementCursorPose.position, appStateManager.placementCursorPose.rotation);
        }
        else
        {
            placementCursor.SetActive(false);
        }
    }
}
Add components and wire everything together
We now need to create the various GameObjects that we’ll be attaching the new Components onto.
In the root level of the Unity Hierarchy, create the following two GameObjects:
- GeneralConfiguration - and add the following script/component (that we created just earlier):
- “GeneralConfiguration.cs”
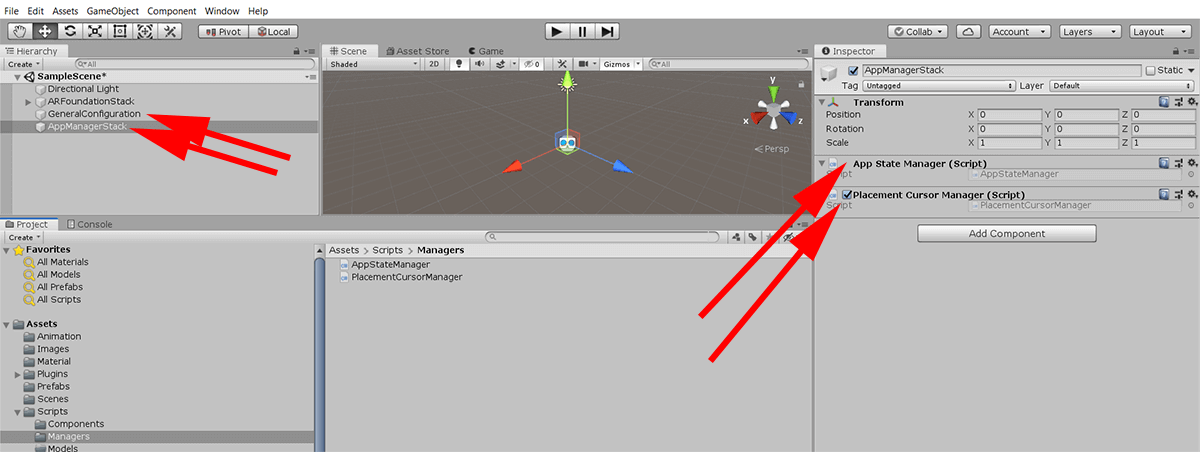
- AppManagerStack - and add the following script/components:
- “AppStateManager.cs”
- “PlacementCursorManager.cs”
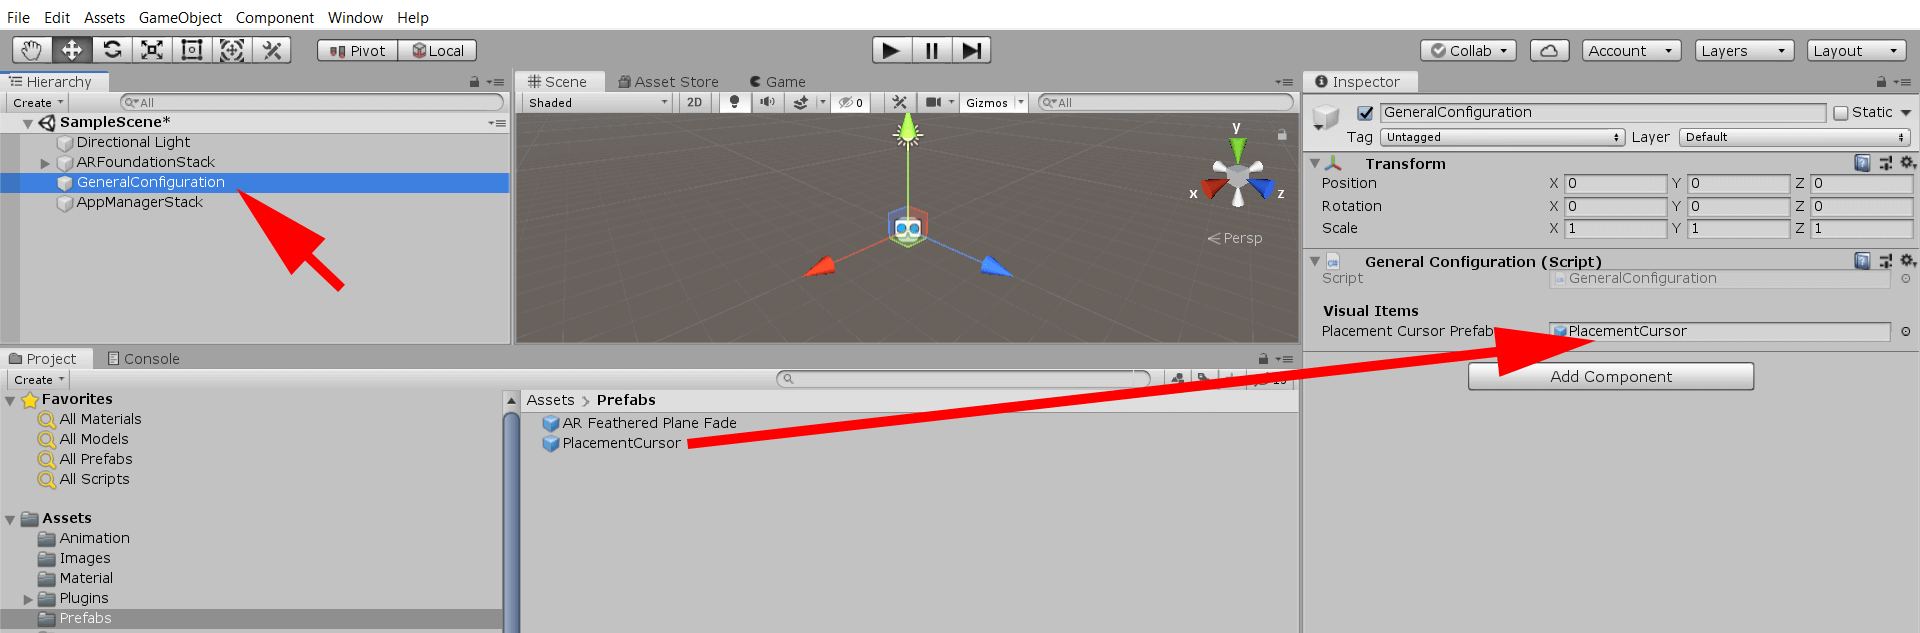
Finally, set references to the “PlacementCursor” prefab, that we also created earlier:
- Select the new “GeneralConfiguration” GameObject in the Hierarchy
- Drag+Drop a reference from the Prefab “Assets/Prefabs/PlacementCursor” across to the property “PlacementCursorPrefab”.
Go and test the application
That’s all the work that we need to do for now.
We can redeploy the project to our device and test the code out!
There’s a couple of things to draw your attention to:
- We store the
Posefor the “PlacementCursor” in the Component “AppStateManager” as opposed to having this variable in the “PlacementCursorManager” itself.
- We do this because as this project evolves, we’re going to be using this value across the application for various other purposes.
- By storing the value in a single place, we can avoid our components having to import references to other components in an unwieldy tangle.
- We do this because as this project evolves, we’re going to be using this value across the application for various other purposes.
- When testing, notice how the “PlacementCursor” will show and hide as we move about.
- This behaviour is intended to provide feedback to confirm that we are pointing the device at a valid surface - e.g. a Plane that has been detected by the AR platform.
Next, in part five, we explore how the UI for the project works.